Website powered by

20 Skin Alphas From Fruits For Zbrush / Substance Painter / Blender

General / 09 June 2020

Hi everyone, I got recently an idea to turn it into an alpha product and it resulted in a very good discover because it also helped me to finish a commission with that, and it's about getting alpha from fruits, you can check the result and the story in the video related to the product in my YouTube channel and I hope this product inspires you to reach or get resources from things that are around us.


You can find the product here: https://artstn.co/m/1mnY


I hope you can enjoy.


Don't push the sign please ///
  

60 Skin Alphas For Creatures / Zbrush / Substance Painter / Blender

General / 09 June 2020

Hello every one, I recently decided to turn into digital products the digital tools, materials and textures I have been creating to finish my latest commissions.

This product can be easily used in Zbrush, Substance Painter and Blender. Also it comes in a 2k res.


You can find the product here: https://artstn.co/m/WvbJ


I hope you can enjoy.


Don't click the sign here please ///
  

Chapter 8.5 - Dark Days Ahead But The Choir Is Back

General / 13 April 2020

It's going to be part of a new digital product line related to fruits.


Don't Click the THR sign please.


  ///

Chapter 8 - Gone With The Wind

General / 10 January 2020


Calling It Quits


My heart died a few months ago and  the spirit who was pushing me to keep running day by day this digital sculpt project also left me too, so the result of it is me calling it quits, dropping this daily project behind to close this chapter.


A secondary reason to walk away from this is that Ramona (my laptop) is getting old and a bit slower everyday, the processor is not the same anymore and the hardware performance has been decreasing bit a bit over time and I'm in a level that I want to reach ultra detailed texture, build whole scenarios and stuff like that but Ramona (so yes I humanized my laptop) can't handle all of that without falling short and crash down.


So this is my last render from this serie that took my life over 161 days.


Learning and Lessons.


Just tons of it, not only technically and theoretically, personal too because this side of the digital art is hugely competitive and deeply filled with technique and procedures, new advances everyday that can overwhelm you, I used Zbrush (an out of this world software with unique qualities) in this whole trajectory and I can't find peace seen all of those buttons but at least I know what can make everyone of them, but to not separate myself from the topic, the main purpose of this small blog is to talk about the 3D way specially in the concept art world in a very personal perspective, as life 3D world can be filled of so many obstacles, difficulties, challenges, so many things that can drown your innocent feeling of just create art or build something new. For me was incredible not only my professional skills where forged, my personal too in the way that I need to always try over and over again, wasted time is never found again but you can always try until you fulfill what you are looking for. I'm checking my first day of this self-challenge (that should be called "Ten Ways To Use Zbrush if You Are A Writer" or something like that) and there was so many insecure shapes all over that sculpt and then I compare it with my latest upload like day_158, day_159 day_160 and day_161 and there is a huge progress in just a few months when it all started sometimes I can't believe how far passion can take us doing something we love, I'm falling short but the main idea to show something new and express the stories I create in the back of my head remained perfectly fine, so that pushed me way further to learn more and more to depict in a fantastic way what I'm thinking when I create those sculpts or concepts from scratch and for sure I won't repeat the same mistake I made in this short journey because that's the point in all of this to learn and improve.


I don't know if I'll return to do it again someday but there is a bit of hope inside of me beside this simulated battlefield that we call life.


Thanks to those who read this blog bravely and constantly,

Til next story.


Patreon: https://www.patreon.com/Three_bhld

Artstation Marketplace: https://www.artstation.com/thr_bhld/store

Gumroad: https://gumroad.com/thr_bhld

FlippedNormal Store: https://flippednormals.com/creator/thr_bhld/

YouTube Channel: https://www.youtube.com/channel/UCI1zTUPk9SBILffgSZVDmNQ/featured?view_as=subscriber 


161 days was not enough.


"New Post" - Chapter 7

General / 03 January 2020


///


Long Time.


Long time that I don't update this blog, is almost impossible to render all the sculpts I make daily and then attend real life but my point of all of this still unbreakable and that is to learn, improve and boost my skills to the next level and never stop the daily progress.


The last month I meet an amazing artist called Alex Vasin (https://www.artstation.com/obriy86) he is selling some digital stuff on his store at Artstation, I got an amazing product from him called Hose Brush (https://www.artstation.com/obriy86/store/Deo0/hoses-brush

The product is really good and solid I even use it in my personal project of 365 daily sculpture and it boost my concept time after that I got from his digital store another good product that I haven't explore on my time sculpting long time ago, it's about MatCaps in Zbrush, I rarely use them because all of my renders goes to Keyshot or Blender depending on the task or the result that I want to reach. For the first time I started to experiment with Zbrush MatCaps and Alex gave me an amazing selection of his work with personalized MatCap (https://www.artstation.com/obriy86/store/8Go3/zbrush-6-materials) also they are on his store too.


No more talk I'll show up the results:

M1

------------------------------

M2: Personal Favorite.

------------------------------

M3

------------------------------

M4

------------------------------

M5

------------------------------

M6


Moving forward.

Such great results you can find using Zbrush MatCaps and if you got well made materials as this you can reach tons of good-looking renders. Moving forward using what you have can be an smart solution, I can't remember why I was running from Zbrush renders and MatCaps for sure I'm looking forward to present more jobs in this way, sometimes is easy to get lost like "oh no it's render time" and you run like a black Friday mom onto the web to find out what's the best render out there and that stuff, but you find out that one of your favorite apps to sculpt your ideas is one of the best render out there too so that's the lesson for this week guys.


No more to say, til next time.


Patreon: https://www.patreon.com/Three_bhld

Artstation Marketplace: https://www.artstation.com/thr_bhld/store

Gumroad: https://gumroad.com/thr_bhld

FlippedNormal Store: https://flippednormals.com/creator/thr_bhld/

YouTube Channel: https://www.youtube.com/channel/UCI1zTUPk9SBILffgSZVDmNQ/featured?view_as=subscriber 


Overtaking - Chapter 6

General / 27 December 2019


///

As individual artist we must know how to make everything for our brand and our image as artist. So this time I'll show up the progress and evolution of the identity I created to push the THR_BHLD project further.


The first idea, a basic San Serif font with the three slash or stripes, simple but good enough to start publishing the project.


A couple of months later I decided to simplify it but it was a mistake because this brand is not so well know to start publish it as an Isotype and the "picture language" thing of course will not work in this case.


  Some weeks later I was returning to the usual identity as the start but this time it came with a bit of difference, integrating the three stripes was enough to make myself satisfied for the moment and the separation between the stripes was a thing too.


And again repeated the same mistake as the beginning, started to publish again in Isotype mode but didn't work, this kind of change will work for well know brands so it's a waste of time to rush and start to plant symbols all over the web.  


But after all of that, like refined by fire came this amazing idea to me, simplify and resurrect in the best shape the three stripes with a edgy form to make it notable between the brands, enough satisfied and this time forever this Imagotype identity it's easy to remember, digest and recognize.


Disclaimer


I know that the disclaimer thing must be in the first part of the post but embrace the difference. So it's weird or almost absent talk about corporative identity or brand identity here at ArtStation (The country of the concept artist, illustrators and visual developers) but I'm talking about this because this is the vision through an independent artist and as individual artist we must be prepared to identify ourselves no matter what, make an outstanding or recognizable logo, isotype and so on of our talents is quite important and for me was really fun to make my way until the final identity.


This the end of the blog post but I'll take this time to talk about my first two products in the market place, one of them have become trend in the marketplace are so that's cool and puts me in the position to say "make it true" so go ahead if you have talent, go and create something nor matter if it's too small or two big, just create and put in another level the things you are making no matter what.


I'll talk about it in next blog post but they are already in the market place in the next url: https://www.artstation.com/thr_bhld/store

And GUMROAD: https://gumroad.com/thr_bhld


No more to say, til next time.


Fear of The Technical - Chapter 5

General / 26 October 2019


///


Functionality


I want to start this entry talking about a band, why? because this band reminds me all of the fear I used to have to technical stuff when I was getting inside into the 3D concept world, the name of the band: Animals As Leaders, personally one of the most technical bands in the world, but their music always shows me that there is beauty in technical procedure and technical skills to achieve a complete piece of art with the most important thing inside of the visual concept world, and that thing is called "Functionality" and I promise this blog post will be more short and less boring. Let's go straight to my point.

In this savage speed behavior I acquired running this challenge I decided  to stop myself a bit and turn down a bit the detail quality of several sculpts and start to clean the dust on my technical knowledge, like UV map, topology, and much more scary technical procedure to turn your idea into a game ready character, object, landscape and so on. Several beginners avoid these path at the beginning and that's good, I know how much beginners turn their back into the 3D world just because they have fear of the technical stuff, my process was kind of hard to attach into my abilities, because when I was getting into this I decided just only to do this for artistic "purpose" and have "fun" but at the end of the day I was with something not very useful, and I decided to give a chance to the scary things inside of the 3D career, and it turned to be that getting into topology, UV and other tech stuff my sculpts and concepts was starting to get a more incredible finish, when it's about hard surface, a good and well optimized topology is everything and I know I said that this time this blog post it's gonna be less boring but I'm making my best. Next on the test:


This week I decided to use "polypaint groups" or something like that, and I had almost a year that I didn't use that technique, but this time is back and is giving me amazing results, just with paint and the amazing algorithm that Zbrush offers. Turn on only the RGB button and in the color palette chose a contrast color compared with the matcap you are using and paint on it. 


After working in the line work, I went to the pluging and press the magic button to turn all of the mesh with this colorful polygroups and stylize with clean shapes the whole sculpt. Just press Border button to generate the polygroup by polypaint divisions. Located in the Zpluging window


  But better than the magic of the polygrouping there is the topology, this time I used Zremesher, very easy and responsive to reduce time and spent it doing other things, I still respect doing the retopo by hand, but this time I'm very satisfied to get and it leaves me tons of free time to work in the UV map and the rest of the scary stuff. Keepgroups always on and turn to zero the SmoothGroups to save your shape and then just hit the Zremesher to generate a much more optimized topology.


After the tech stuff I decided to play a bit with the Curve Frame Function and to learn about structures a bit.


Conclusion


Making the promise true this is the end of the blog post, next time I'll show how I make UV with Zbrush pluging, is very fun and useful, I know is not the best but for the speed that I need to finish this challenge the software (Zbrush) is delivering me all that I need to still get fun doing what I love.


Til next Friday.


365daychallenge at https://www.artstation.com/thr_bhld and https://www.instagram.com/thr.bhld

The Strategy - Chapter 4

General / 19 October 2019


///


Statement
  

This last week of progress has returned to me incredible results in the meaning that the improvement in the anatomy thing are getting really good taking that "not so good" advice about learn anatomy in a different way than usual and I think that finally I have learned all the new improvements of the last Zbrush software update, there is an amazing too called Spotlight and this time the development team from Pixologic have delivered a very good tool to create forms and shapes, it's more related to the hardsurface thing but the change is huge and intuitive to keep moving forward and make it more easy to digest the whole UX from Zbrush and all the things that software can offer you in one place.

Let's not lose the sight from the main point so, I'll talk next about the anatomy thing, monster anatomy of course is never equal as human anatomy, there are approximations and nothing is impossible in for the art world, but I decided some weeks ago to learn about anatomy but not as usual, taking some classes or tutorials about human anatomy, I decided to start it at something different, creating creatures and applying to them some characteristic of the human anatomy. What am I trying to mean is next here:


This time started the exercise deforming and refining at the same time the human shape.


After that exercise I found up myself just paying a bit with it and this is the result of it, more confidence in getting humanoid shapes.


The Spotlight Thing


Meanwhile this week finally after so many time, I finish to comprehend and get the overall update of Zbrush 2019, that was really slow to be honest because Zbrush 2020 will be coming by the end of this year or even more closer this next month due to the publish schedule they have, but the point here is that when there is a software update you must spent no more than one to learn clearly all the updates that comes with the patch or the expansion, this time it took me more than one month, but feels good, to be updated and aware of all the new things that your favorite software can offer you and the new and improved Spotlight tool have much more things that blew my mind to be honest related to the Zbrush boolean system and it can make very sharp and clean stuff with this new development that Pixologic offers, results? next here:
  

The decorative lines and the cuts across the surface are product of the new Spotlight improvement, I'm able to show up more detailed hardsurface concepts with this tool.

Clearly I need to improve even more my speed using this, because I'm learning all of this new things inside of the challenge time that actually is set in 120min daily, I'm planning to raise the limit very soon but for the moment I'm getting quick response and speed on the concept development, but this tool can help me to deliver more detailed shapes in the next days of the render.


The Strategy


An important mistake appeared this week, and this is what this blog chapter is about, the mistake? I think that I have been doing something wrong, and that ironically is to have an strategy, since I started this challenge, I have been just opening a dynamesh sphere in Zbrush and then spent the time limit throwing lines, shapes and details into a digital mass just projecting what my mind was building for me in the imagination and loosing time specially in the satisfaction "thing", why? because we as artist don't rest until what we are doing starts to satisfy us, as creators we start to suffer that particular thing and I was losing time doing that, so I decided this week to create a base mesh or a base shape with geometrical forms and it boost the speed and the improvement of my skills to the top.


On my day_131 to day_140 post there are much more models made under this new way, I need to add that there is nothing compared to confront your sculpt from zero, but is really good to use geometrical object to build up what you are thinking and gives a good approximation to what you are trying to reach and open infinite alternatives to new ideas and sculpts. Back to the point, the strategy is to set up a graphical base of what you have in your mind, a basic one, no more than 15 minutes sketching or building up with geometrical shape if your case is the digital sculpt.


Detailing


This is something can cage you forever, and I'm talking about details, I'm a kind of obsessed  with detailing an sculpt or an artwork but thankfully I decided to put a time limit on the challenge, if not this will be a complete chaos, even sometimes I spent my whole time just detailing and forgetting other things, it's really easy to see in the whole progress I have been achieving here, sometime in two hours I can reach a very good full body concept and other days I almost can make a comprehensible shape on the sculpts and that is because I mix getting out of the comfort zone and detailing, so the result of that is huge amounts of time lost in depicting a very detailed small area of what I'm doing, more easy to explain.  

First step: spent 30 min masking all the surface of the concept just to bust my pen and tablet skill.


After the mask inflate the space that was selected to be affected by the mask. Just to achieve something different than a bunch of creature bust and hard surface bots.


Cables and wires can always save your mess, and this one I like it just for the little grade of detail that the wires let me achieve on this one.


A Difference


This week remarks to me a huge difference, and it's related to the learning thing, been a lone ranger in this way and do what ever you want just to learn how to solve things by your own is good is really good because it can help to be a independent artist, but getting yourself into the learning thing like tutorials, classes, courses and all of that stuff is going to launch you like a rocket out of the space, and lot of the learning I got this last week was thanks to Arrimus3D tutorials, Michael Pavlovich, Artstation Learning, Adan Martinez and they are all out there in the internet, easy and free access to reach what ever you want.


Till next post.


Signal Fire Pt.2 - Chapter 3

Article / 12 October 2019

///


Welcome Back.

Welcome back to the blog thing, I'm welcome too, to keep this "writing therapy" I have started some weeks ago but enough of me in this episode, let's go straight to my main point.


The Main Point.

The last week chapters I was talking about just a bit about what inspires me to sculpt, or the ideas I depict through my sculpts, the true is that I'm a kind of writer, not a professional one of course, but I enjoy a lot writing and depict the factory of ideas that is placed in the back of my head. Been too young I started to write after seen a movie that totally change my vision and imagination when I was 11 years old, the name of the movie is Gattaca, the premier of this movie was in 1997, I saw this movie for the first time in 2003, 6 years after the release of it, thinking about it right now it was a very mature movie for me because this sci-fi movie doesn't have all the explosions, shootouts, colors and blinding lights from the most popular sci-fi movie back in that time, but this movie made a huge change on me about how to look at the future, it's not all adventure and resolving quest, and yes it was too much time after that famous Popular Mechanic article from Star Wars that gave me the base idea to became who I'm today related in my profession, that magazine just showed me that a human been can draw and depict so much details with just a whole picture, but this time, this film was the last piece that I needed to totally dedicate my life to do what I love.


The premise of this film, a old one but very good in my opinion, is that this movie depict a closer future, a future more near to us, where genetics are the only thing that rule the world, and genetics turned into the most valuable thing for society, in this future science reach the possibility to create the perfect human being, even you can customize your own children before they born, selecting the skin color, hair color, eyes, athletic and so many other things, so the movie depict other main scenarios that are overwhelming and interesting because "acceptance" in your society was highly related to your genetics and the main character deployed one of the best ways to mock on it and reach his dream to explore the galaxy someday. The movie is more complex and it have more layers to keep exploring but this blog is not a "movie review".


The signal Fire.

Why I'm talking about this? because beyond the drama and the suspense of the film, there are tons of graphical, concepts and designs that complements the story and the tone of the movie perfectly, at the end of the movie I remember to be amazed and intrigued, I wanted more, and my mind started to create more alternative endings and even I started to imagine a second movie, that was the beginning of my habit to grab a pencil and a paper to write, just to write and write, sketch non-senses, little monsters, devices, armors, spaceships, just everything that was projecting in the back of my mind, there born another part on me related to poetry and personal stuff but I'm going just to write here about how it affected me in the artistic way, years going by, growing older and there started to come more complex and well based ideas as I was growing older, this helped me to create the base and the concept of a novel that I'm still writing and developing, and then came other side stories, I wrote two sci-fi shorts, I'm developing another novel besides the main one, all of them related to my ideas about the future, the near future and the future much more beyond than our lives can show to us. 


This challenge that I'm running everyday is based on those stories, and based on new stories too, because I discovered through digital sculpt that I can say stories through it, turn words into images and visual concepts, after so many words I'll show a few sculpts that are related to my stories, that are enough for me to keep sculpting everyday, several people through this challenge process have asked me "where did you get the ideas, do you use references" because I'm sculpting and rendering everyday something and like I said all is in the back of my head and based on the stories I have been writing, of course I get inspiration through other artist like everyone but I rarely use references or something like that, my work flow is just basically put the object, push the button Make Polymesh3D and then I just sculpt remembering the stories, the ideas and the sketch I make sometimes.


Finally the images:

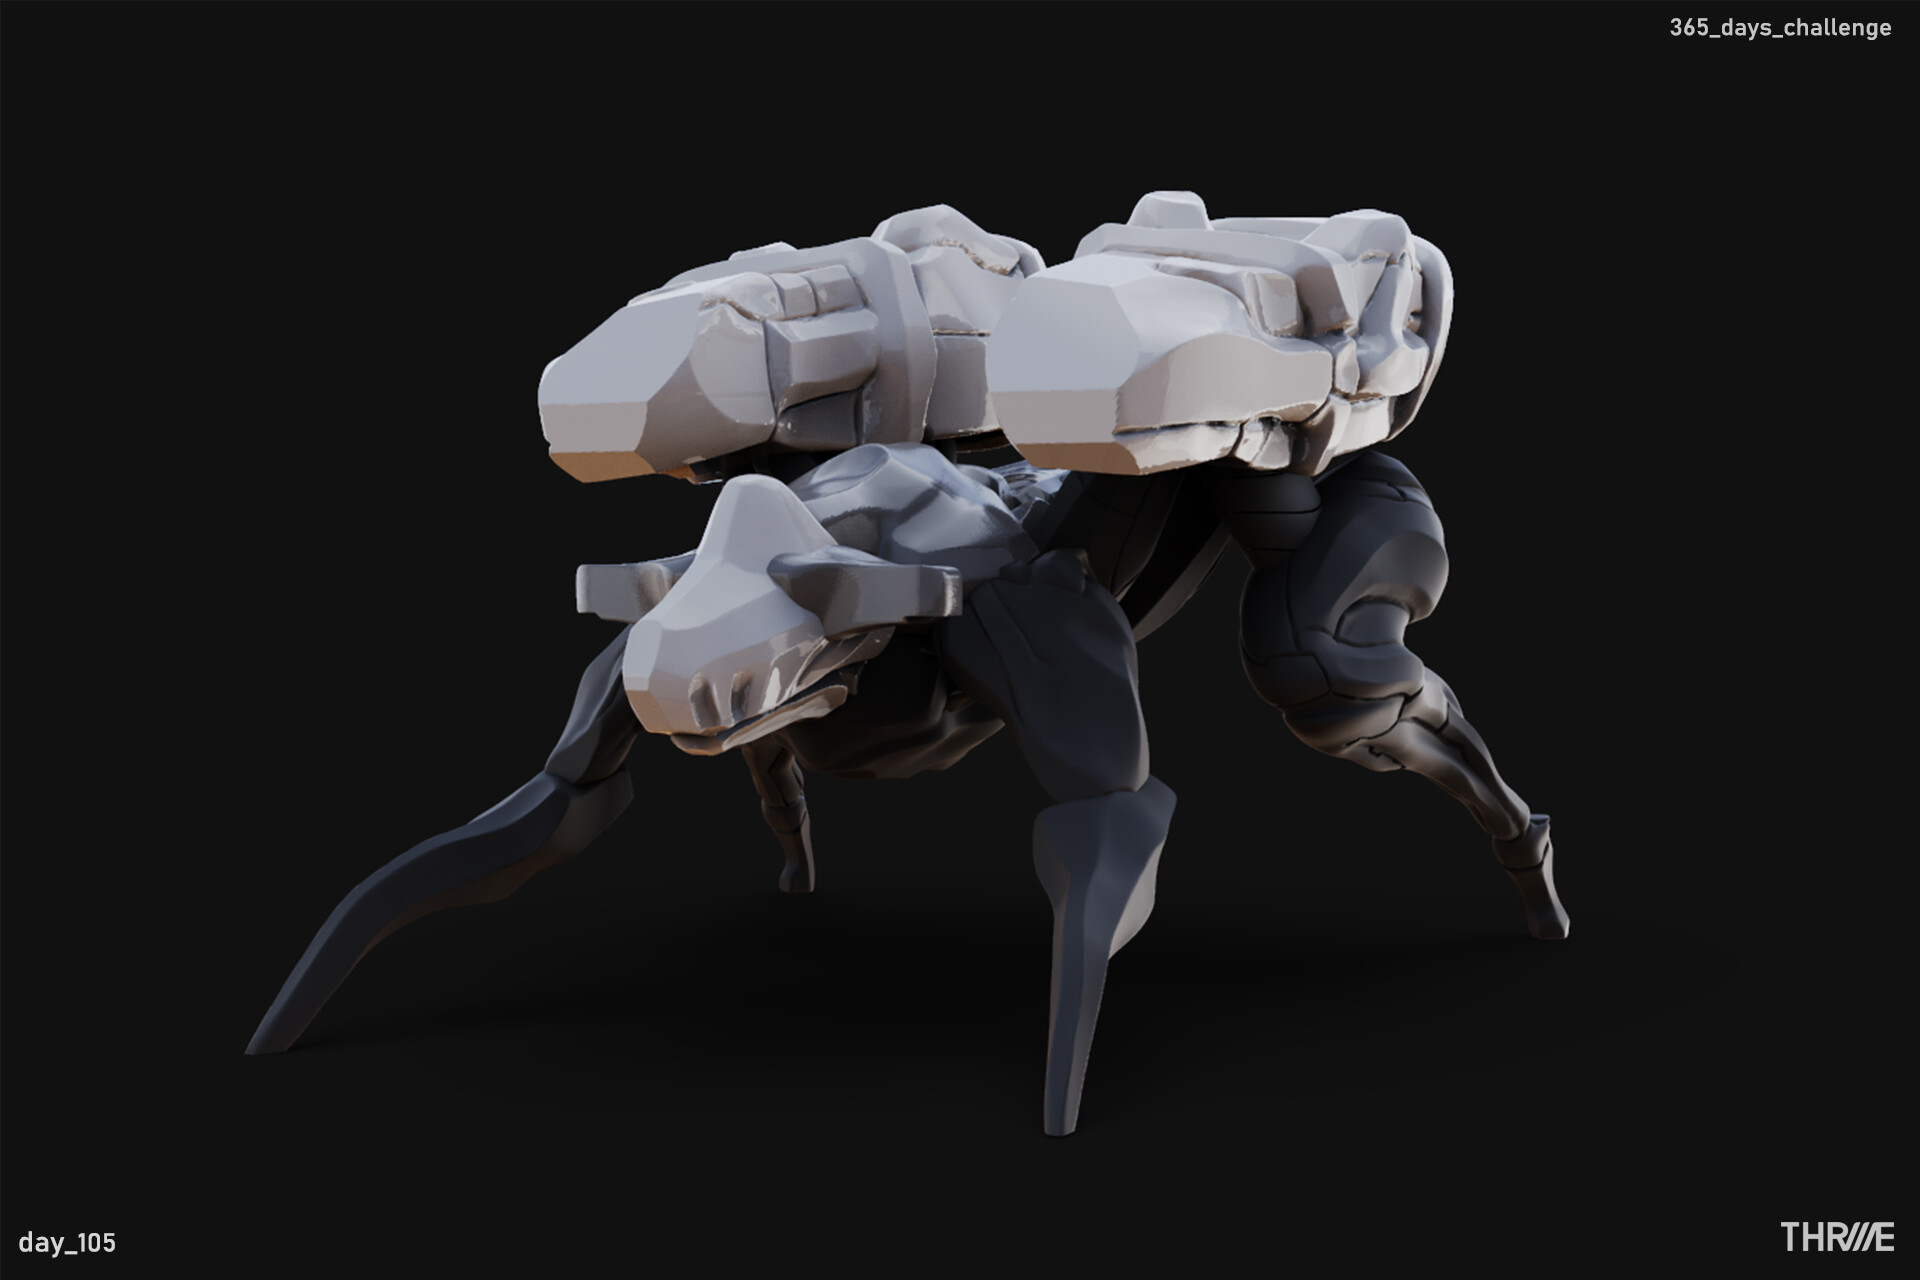
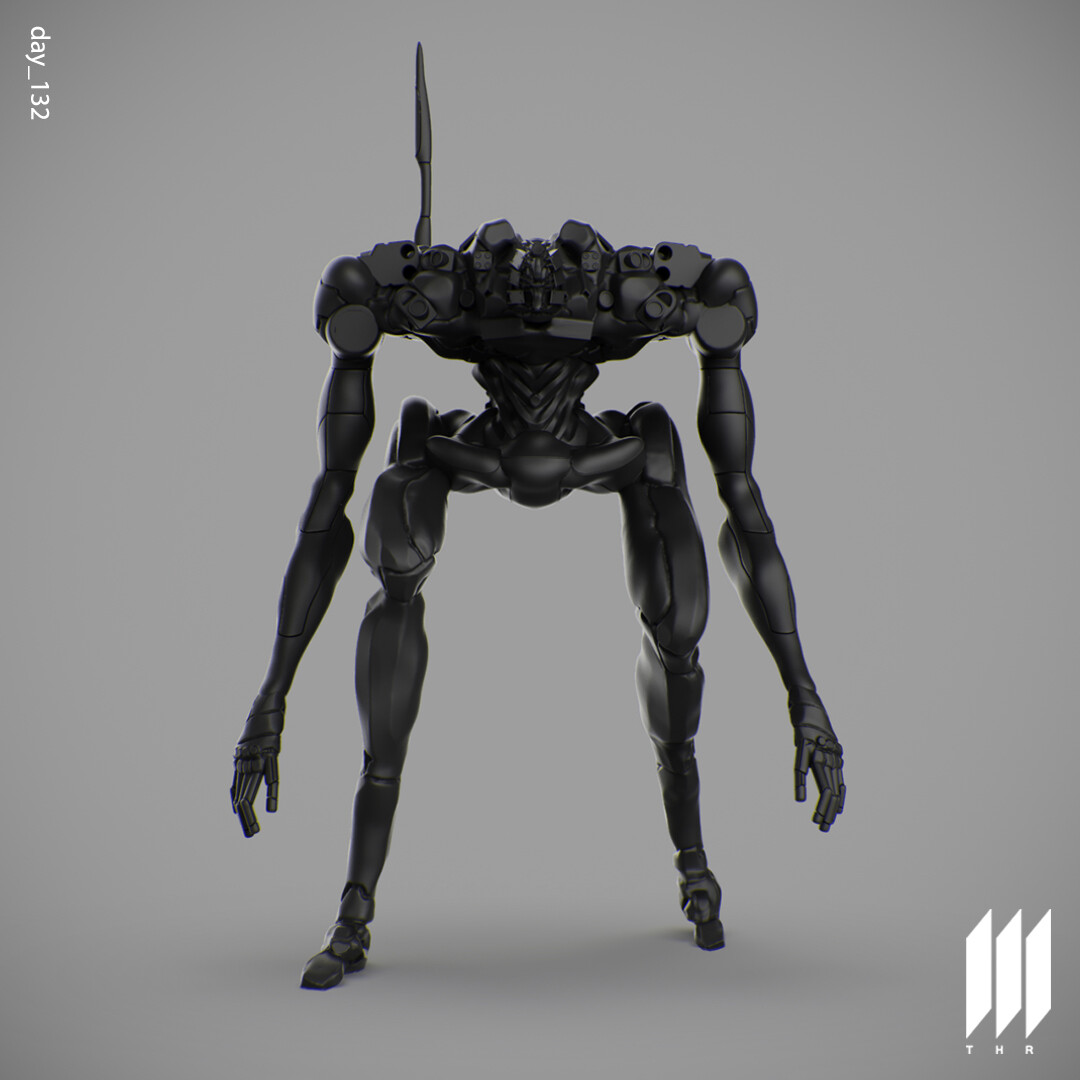
The Human Hunter - Concept

Make the first appearance in the story when the main character is ambushed by this machine in company of the New Mars Soldiers. The concept behind it that this mech is designed to find and capture dedicated objectives or small groups.


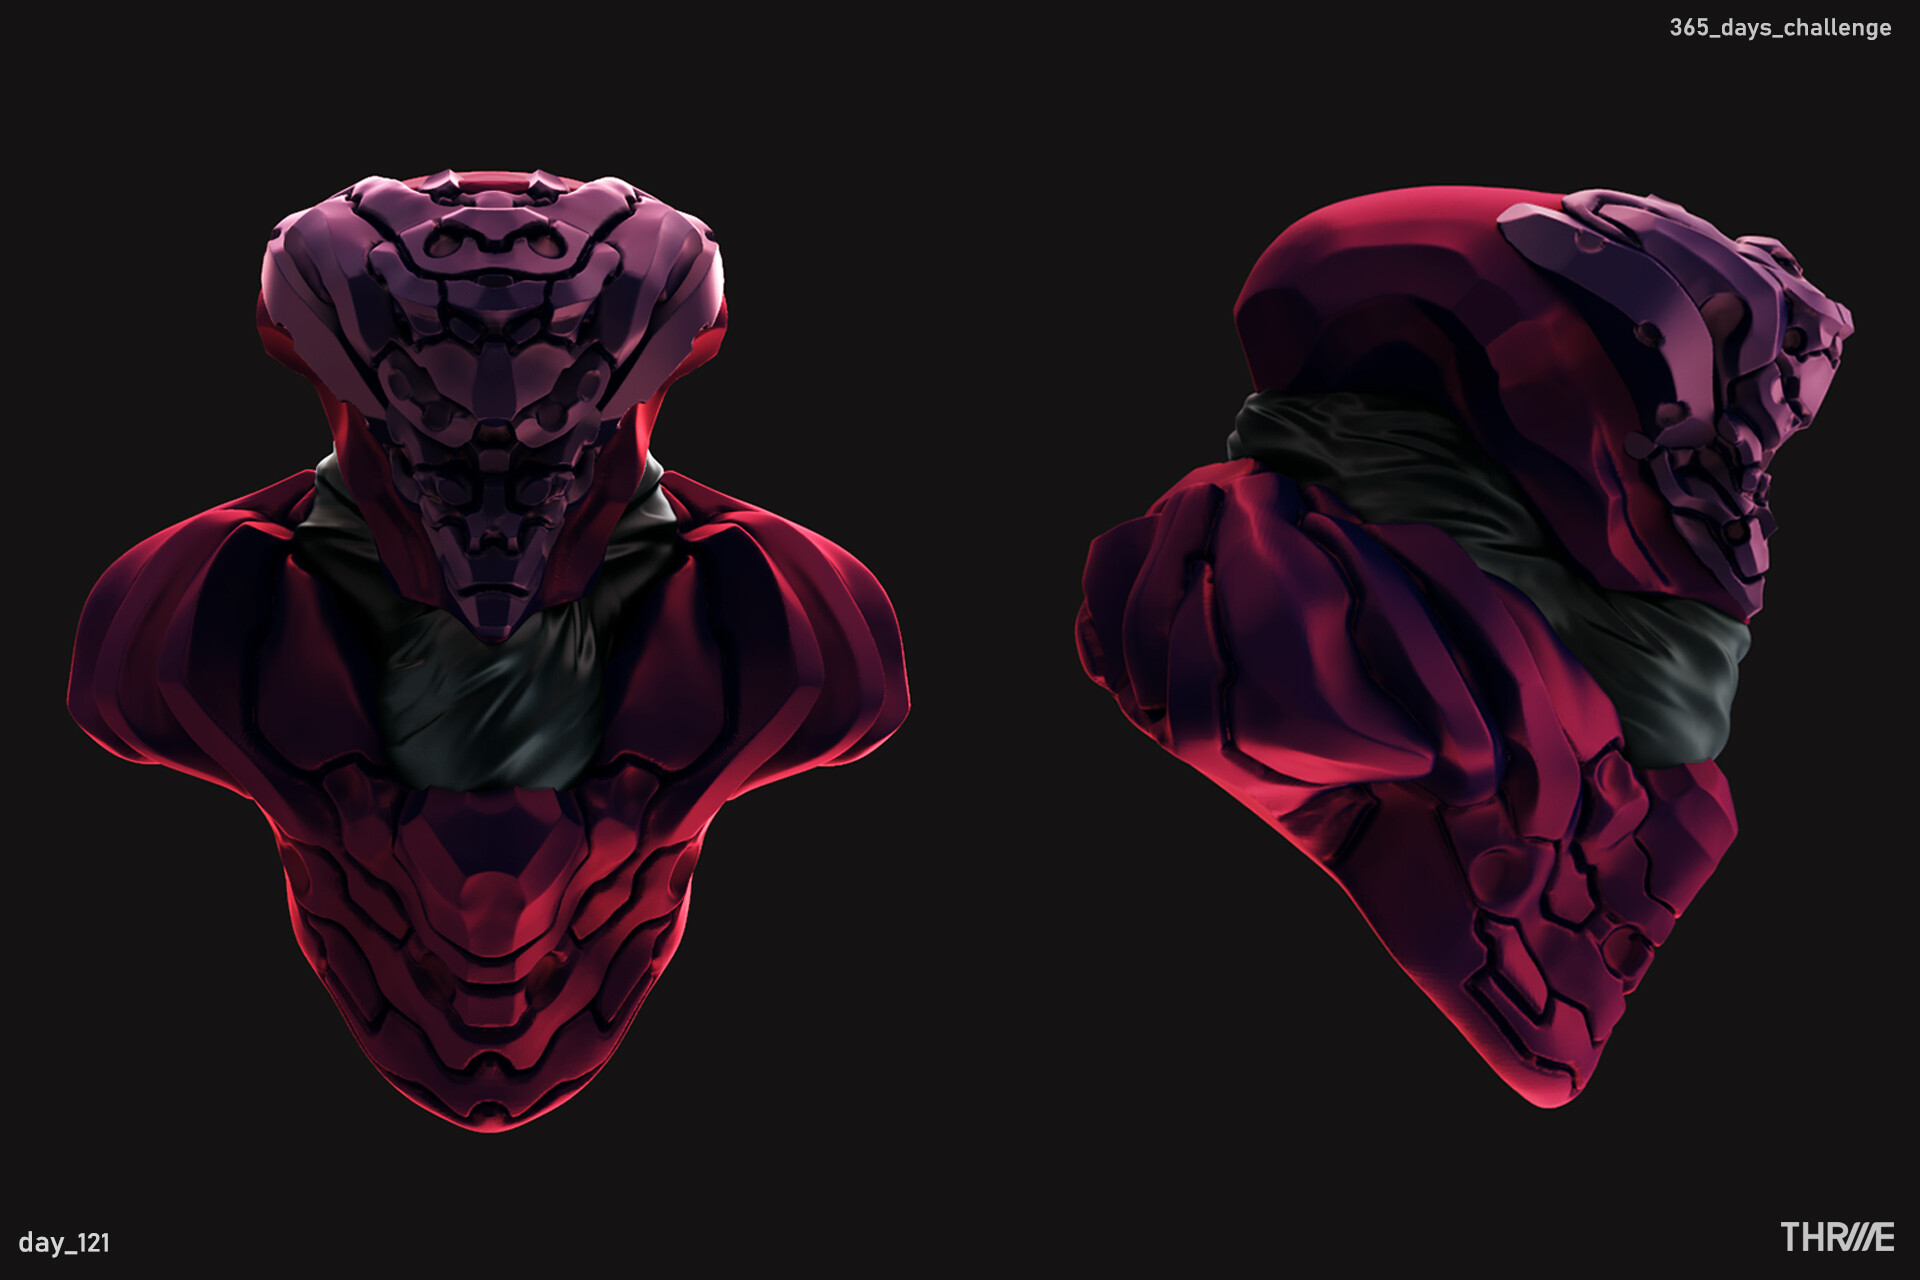
New Mars Soldiers - Concept Armor

The first enemy that the main character confronts in a close combat, this enemy character have this particular color because the main concept of this soldier is to depict royalty and elite. The main character confronts them in a abandoned laboratory becoming the first battle of the story.
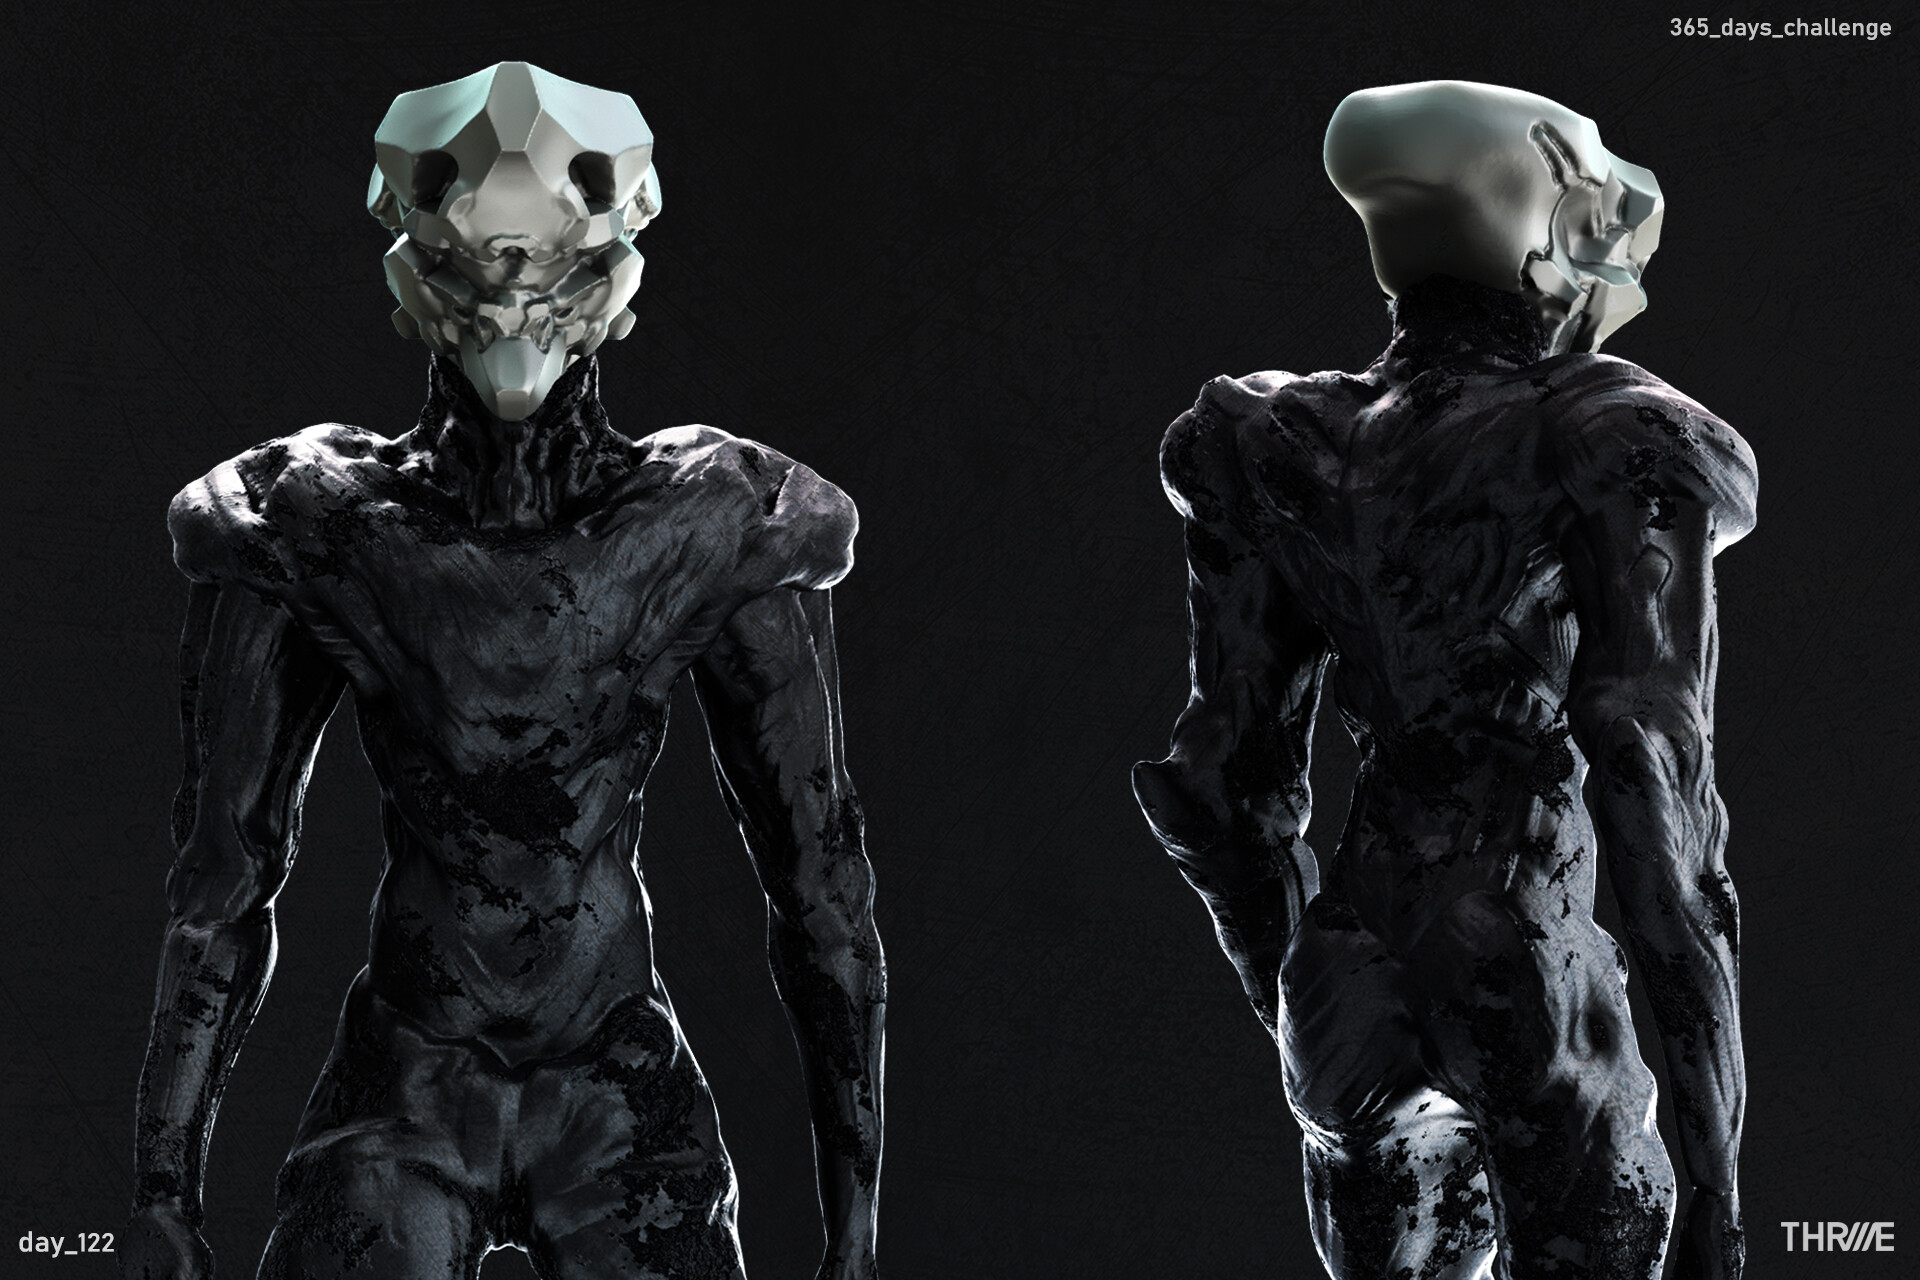

Vision°1 - Concept

This is part of a dream I had long time ago and I decided to blend my vision with the main character story, this "demon" vision appears for the first time when the main character is on the ground between the debris or ruins recovering the strength to escape the main character see this walking demon as a vision beyond the flames and the destruction that leaves the ambush behind.
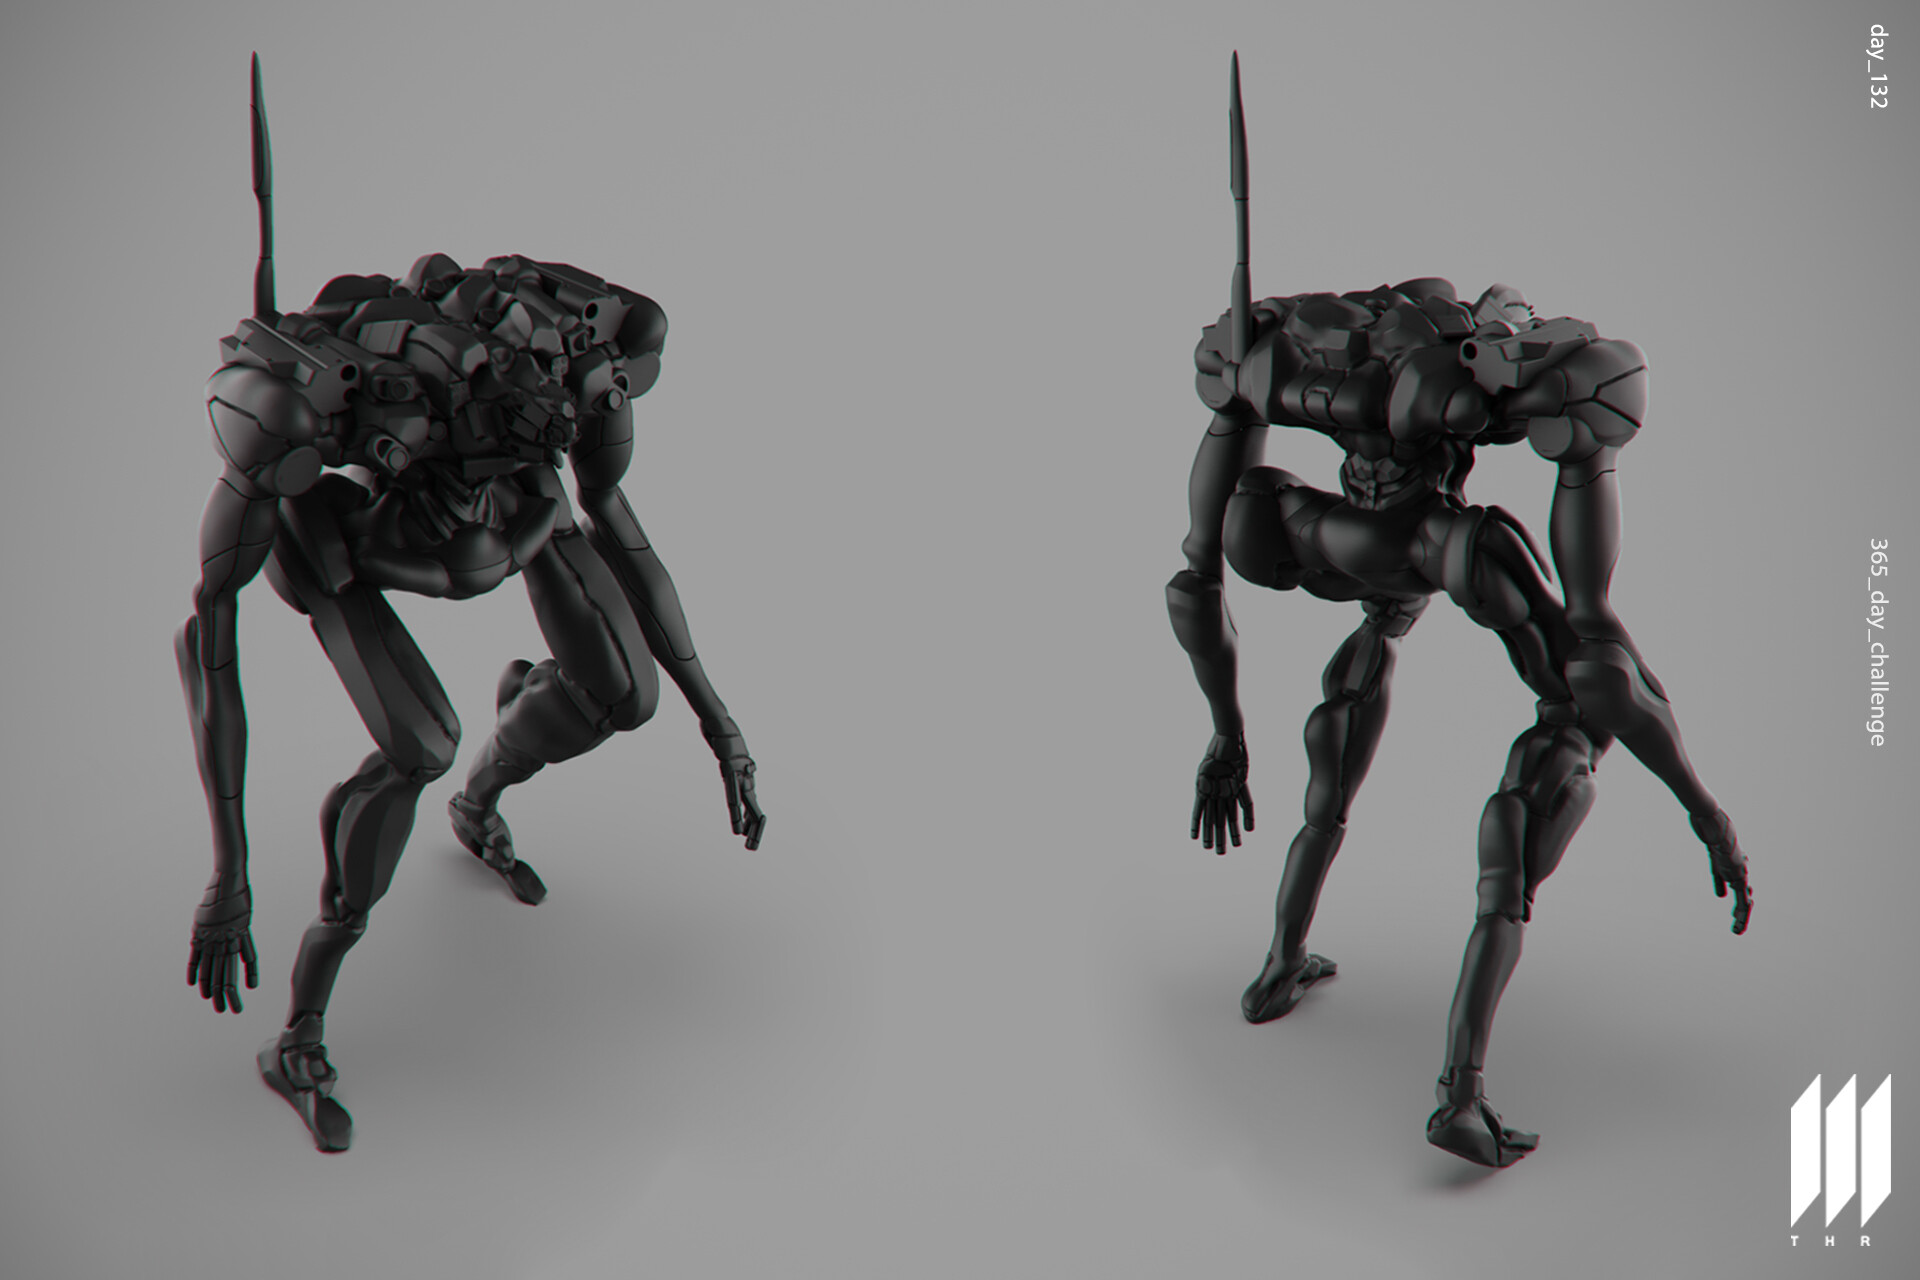

Vision°7 - Concept

Another dream that I blend on this story, but this is a vision that I describe in a further point of the novel, the main character in a wrath episode after destroying everything around her, her mind project this creature as a vision besides her, just showing all the destruction that she made. This sculpt turned into my first post in SketchFab, the is more information about the concept in the 3D live model I made on SketchFab.


An Small Change.

This last I think I made the last change on the identity of the brand that I'm building here, this time is more simple and a bit minimal, more clean and easy to digest. This is something good because after a long time I'm using all the things I learned by myself when I was back in my university, is really good and satisfactory be able to create and redesign of my identity skills (I think) and next post I'll show the progress of it, how was it in the beginning. 


Will be very fun to compare it with old versions.


Even I changed the layout and configuration to my work and posts on the social media.


And for other social media post.


Conclusion.

This post has become a long one and I must end it here, but before that I need to put here that you can check a more updated day by day post of the 365DAYCHALLENGE I'm doing at my Instagram account: https://www.instagram.com/thr.bhld


Til next Friday.

The Diagnosis - Chapter 2

General / 05 October 2019


///


Adding something personal.

Exactly like a year ago, I was in my laptop working on some personal projects and after 4 or 5 hours of non-stop working my heart started to beat very painfully fast, I just ignore the pain and keep working but 30 min later was impossible to keep working, so I went to the doctor, and simply I was diagnoses with a slight scoliosis, slight enough to press on my heart nerves and cause me an actual pain that sometimes is not so easy to handle, but more important than the doctor forbade at all to be seated on my laptop working for no more than 2 hours per day. To the point I'm talking about this personal problem because anything have stopped me to reach my dream, no one thing can stop you looking and making your way of the things that you love and one of the "must have" things that should have an artist is love in the hands and mind to do what it most loves, because this diagnosis haven't stop me from what I want, yes sounds childish but I'm still having dreams and personally I though that having the heart of a child makes you live forever.


Returning to the art thing.

I have been working very hard finally in anatomy sculpt or been putting more attention in full body sculpt, so these last two weeks I have been trying to complete some day challenge as a full body and I have been getting slightly better since the beginning, next up some examples:


day_122 Final Render at:

https://cdna.artstation.com/p/assets/images/images/020/958/776/large/diego-m-zanelli-day-122-01.jpg?1569846901


This must be day_132 Work in progress.


Back to words.

From day_29 I made a huge jump in day_122 like... I just can't explain it right now but here I'm improving my "anatomy" skills going through repetition and perseverance, over and over again repeating moves and giving memory to my hand in every sculpt because I see now that my way to complicate things in this challenge is finally fruitful to me and of course I need to add that back to day_27, _29, I was just having 30 min limit time to make that body and in most recent days I'm using just 120 min time limit to create the daily sculpts, I know these sculpts have some mistakes, and there is something good in looking into mistakes because this makes you aware of what you are missing and prepares you to not make the mistake again, to fix it and the best way to reach perfection is going through mistakes to never come back and repeat them, repetition is the key on this post.

These last days, I notice that I'm getting through anatomy in general just running sculpts related to monsters with deformations or robots (mecha) totally shaped by chunks and pieces and this is not the conventional way to learn it, but it works, it's working for me perfectly, yes, I must be wrong and this will be not the best advice you can receive in your art career, but is working, all of this time before day_122 I have been sculpting tons of monster, quad-legs or six-legs, a bunch of monster bust with some human aspects anatomy and this gave me the best position to restart full body sculpts like I'm showing in day_122, and yes this is a kind of monster I know but it have more humanoid shape and this type of sculpts are approaching into human body anatomy and that's what I wanted from the beginning to be honest so I chose a different way to learn what I want in this challenges and it's giving me what I'm looking so this leaves me with the conclusion that I'm controlling this challenge and the challenge is not controlling me.

Signal Fire Pt.2 must be the next chapter because I'm starting to connect my concept sculpts with stories I have been writing several years ago and it's a different approach to give more detail layers and meaning in what I'm doing.

Til the next Friday.